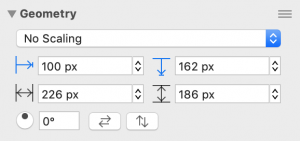
In the Geometry Inspector you can view and edit the position and size of an element. This is a handy thing — but there are a couple tricks you may not know about.
Math
The fields in the inspector work kind of like mini-calculators. Let’s say you want to change the width so that your object is exactly half the width it currently is.
You could do the math in your head, or you could open a calculator app — or you could do it right there in the inspector.
Where the width field might say “472 px”, just add “/2” at the end, so that it reads “472 px /2.” Then hit return.
The width field now says “236.”
Let’s say that you want to add 10 pixels: select inside the field and add “+10” at the end. And now it says “246.”
To subtract, use the – character; to multiply, use the * character.
(Note: plain old “10 + 10” doesn’t work — the first number needs to specify units. “10px + 10” works.)
Mixing units of measurement
Let’s say your unit of measurement is pixels, and you want to stick with pixels.
But you do want a particular element to be horizontally positioned at 2 inches. You could change your units, make the change, then set units back to pixels.
Or you could calculate the conversion yourself.
Or, instead, you could do it the easy way: in the horizontal position field, type “2in” and hit return. OmniGraffle will translate that to pixels for you.
And — bonus! — you can mix this with math. Even though your current unit is pixels, you can add (for instance) three feet: just add “+3ft” at the end, hit return, and OmniGraffle will translate it to the right number of pixels.
Documentation
The Geometry Inspector is pretty smart, and it’s designed to make things easy for you. There’s more to learn — see the OmniGraffle manual’s section on changing object position and size with the Geometry Inspector.